Mexico City Enchiladas

Made this one for Christmas Eve along with the Enchiladas Verdes. Oh yum!,

MB's Table

When I say “I’m thinking of making a batch of enchiladas.” the first thing my husband says is “Mexico City Enchiladas?”  What last weeks Chicken Enchilada Verdes lack in authenticity, Mexico City Enchiladas make up for in spades.

DSC00438

The source is another of my go to cookbooks – Mexican Cooking by Cynthia Sheer.   It’s one I gave to my then “boy friend-to become husband” for Valentines Day because it had a recipe for Huevos Machaca.  I’m not sure we ever actually tried to make it because nothing could ever live up to the dish as served at Manuel’s Original El Tepeyac  in Boyle Heights, Los Angeles.  If you are ever in LA, it is a place you should try to  visit.  Their claim to fame was the  MANUEL’S SPECIAL BURRITO made with Original Chile Verde Pork It weighed in at 5 lb. and would easily feed a family.   But it was…

View original post 1,269 more words

Breadless Tuna Salad “Sandwiches”


DSC01026

Today I’m going to stray a bit from the general theme of this blog and share a recipe for a Breadless Tuna Salad “Sandwich”.   While I can’t claim that it’s a family favorite yet, it is part of a new project I have which continues the theme of helping people put good food on their table.

Starting in April I’m going to be teaching some classes at a local Senior Guidance Center that provides free Health and Wellness support to the community.  The theme for my first class is recipe make-overs.   I’m choosing the classic Tuna Salad Sandwich as the recipe to tweak in the direction of lowering the fat, sodium and carbohydrate and at the same time keeping the  omega-3 fat from the tuna and adding and a nice serving of vegetable in the form of cucumber and other green stuff.

I think it’s a nice switch from the rather bland classic tuna salad sandwiches and will be a perfect fit for those hot summer days that must be just around the corner.  It will also provide a great outlet for the abundance of cucumbers that I usually have in my front yard garden plot.

So here we go.

Most of the ingredients are pantry and refrigerator staples.  Today I’m substituting shallot for the green onion/scallion in the recipe because it was what I had on hand.  The same goes for the dill component, dried dill weed will stand in for fresh until I have some in my garden.   You could substitute some dill relish or dill pickle etc. but this will increase the sodium content.   So if your watching your sodium intake stick with the herb or leave out any added salt called for in the recipe.

DSC00990

The best cucumbers for this recipe are the long English type that come wrapped in plastic in the grocery store.  They have thin skins and are not waxed (that’s why they are wrapped in plastic).  The also have fewer and smaller seeds than many cucumber varieties.   When you can find locally grown cucumbers that have no wax coating they would be a great choice as well.  

Depending on your preference you can leave the peel on or peel stripes as I’ve done here.  Scoop out the seeds (a grapefruit spoon is a great tool for this but any spoon will work) and poke some holes along the length of the cucumber.

DSC00991 DSC00995

Because I don’t like to waste food, I’m saving the middles and the ends of the cucumbers to make some tzatziki for another meal!  You’ll find a recipe for tzatziki on this site in the Lamb and Goat section, but this one will be a more simple version with just a little salt, garlic and Greek yogurt.

DSC00997

Back to the recipe at hand!  The base of the dressing for this salad sandwich is a basic vinaigrette with a ratio of one part acid (red wine vinegar) and one part extra virgin olive oil, a bit of mustard and some salt and pepper

DSC00998

Whisk the vinegar, mustard, salt and pepper together and then slowly drizzle in the olive oil while whisking constantly to form the vinaigrette.

DSC01000

Lightly brush the cucumber quarters with the vinaigrette.  Those holes you poked in earlier will help the cucumber absorb the dressing.

DSC01001

Now your ready to start building the rest of the filling.  Because I’m using shallot I finely mince it and add it to the vinaigrette first.   This helps take even more of the sharpness of an already mild onion down a bit. Next, it’s a fine mince on the celery leaves and celery stalk and some lemon zest for brightness  (if you don’t have a lemon on hand don’t worry, it will be fine without it)

Add all of the above to the vinaigrette bowl along with the dill, yogurt, mayonnaise and some black pepper  and  optional salt (no more than 1/4 tsp. but I left it out entirely).  Stir to blend.

DSC01010

There are many choices in canned tuna.  For the most omega-3’s choose tuna canned in water rather than oil.  Today I’m using one can of white albacore and one of chunk light.  These happen to both be 7 oz. cans rather than the 5 oz. cans specified in the original recipe.  I didn’t find that the extra 4 oz. of tuna made the salad too dry but it will alter the nutritional profile. 

Now for a little finely shredded lettuce which is standing in for the sprouts today.  I love fresh sprouts (alfalfa,spicy mix, onion etc.) but they have a short shelf life so I usually don’t have them on hand.  I do almost always have some sort of dark green leafy lettuce however.  Today it’s baby romaine.

DSC01017

Now we’re ready to build the “sandwich”!  If you wanted you could also turn it into a stuffed tomato “sandwich”

And there you are, a breadless tuna salad “sandwich” with a side of tomato.  I did find the sandwich a little fat to bite through, and ended up eating it as an open-faced “sandwich”.   I didn’t miss the bread or extra mayonnaise at all.

DSC01029

Breadless Tuna Salad “Sandwiches”

by: M.B. Einerson

Adapted from Food Network

Yield: 4 servings

  • 2 English cucumbers (peel on or partially peeled) – any un-waxed cucumber will work
  • 1 Tbsp. red wine or apple cider vinegar
  • ½ tsp. Dijon or Spicy mustard
  • Kosher or Sea Salt and Ground black pepper
  • 1 Tbsp. extra virgin olive oil
  • 2 green onions/scallions, white and light green part, thinly sliced or one small shallot finely minced or ¼ cup minced chives
  • ¼ cup low-fat plain yogurt
  • ¼ cup chopped fresh dill or 1 tsp. dried dill weed or seed
  • ¼ cup celery leaves
  • 2 Tbsp. mayonnaise (low-fat if desired)
  • 1 small stalk celery, thinly sliced or minced
  • ½ tsp. lemon zest
  • Two (5 to 7 oz. can-ounce) cans chunk white or light tuna in water, drained
  • ½ cup sprouts (alfalfa, onion etc.)* or finely shredded lettuce

Halve the cucumbers crosswise and lengthwise. Use a spoon to scoop out the seeds and some of the flesh to make a boat shape.  Poke the inside of the hollowed out cucumber several times with a fork.  In a medium bowl, whisk together the vinegar, mustard, 1/8 tsp. of salt and a few grinds or a pinch of pepper.  Slowly drizzle in the olive oil, whisking constantly until well blended.  Brush the inside of the cucumber boats with some of the vinaigrette.  Reserve the extra vinaigrette for making the filling.

Add the onion or shallot or chives to the remaining vinaigrette and stir to combine.  Stir in the yogurt, dill, celery leaves, mayonnaise, celery, lemon zest, ¼ tsp. salt (optional) and a bit of pepper into the bowl with the vinaigrette and onion.  Add the drained tuna and stir to combine.

To assemble the sandwiches, fill four of the cucumber quarters with the tuna salad and top each with ¼ cup sprouts or lettuce.  Top each with one of the remaining cucumber quarters.  Wrap each sandwich in wax paper or plastic wrap and refrigerate if not eating immediately.

* Note that fresh sprouts are highly perishable and have been associated with salmonella and other food borne-illness.  They should only be purchased from a reputable supplier, kept refrigerated and used promptly.   People with weak immune systems, should avoid eating sprouts.

Enjoy!

MB

for comparison

Tuna Salad Sandwiches

Source: Betty Crocker.com

  • 2 cans (6 oz each) tuna in water
  • 1 medium stalk celery
  • 1 small onion
  • ½ cup mayonnaise or salad dressing
  • 1 teaspoon lemon juice
  • ¼ teaspoon salt
  • ¼ teaspoon pepper
  • 8 slices bread

Drain the tuna in a strainer in the sink. Chop the celery to measure 1/2 cup. Peel and chop the onion to measure 1/4 cup.

In a medium bowl, mix the tuna, celery, onion, mayonnaise, lemon juice, salt and pepper.

Spread tuna mixture on 4 bread slices. Top with remaining bread slices.

Nutritional Comparison

Calories Fat Sodium Total Carbohydrate Fiber Protein
Breadless Recipe (using 10 oz. of canned tuna) 210 11 g 300 mg 7 g 1 g 19 g
Standard Recipe ( 12 oz. of tuna) 410 24 g 870 mg 29 g 1 g 21 g


What Do I Do with Those Leftover Chicken Parts Soup

DSC00984

In my previous post on Chicken Cacciatore I used the meaty parts of a whole chicken and was left with almost 2.25 lbs. of chicken with a little bit of meat and loads of flavor.  So, while the Cacciatore was simmering away,  those leftover parts were well on their way to becoming a pot of Chicken Noodle Soup.   I’m a huge supporter of the movement to reduce the amount of food we waste in this country and this is an example of how with a little bit of effort you can turn one chicken into two great meals and use up the dribbles and drabs hanging out in your refrigerator and pantry.  I have been calling  this type of dish “Refrigerator ……” but I think I may start referring to them as Dribbles & Drabs as I just looked it up and Dribs & Drabs is considered an emphatic phrase.  I’m pretty emphatic that this is a good practice!

It starts with all those bony chicken parts that you have when using a whole chicken for pieces in a recipe.  If you don’t have time to deal with them immediately, just throw them into a plastic bag and toss them in the freezer until you do .  However while the Cacciatore is simmering you should have plenty of time to throw them into a pot or pan.  Sprinkle with salt and pepper and put them into a hot oven to roast for approximately an hour.  I usually turn them over about half way during the roasting to make sure all surfaces are nicely browned.

DSC00918DSC00937

When they are browned, set them aside until they are cool enough to handle.  Pull the meat from the bones.  Refrigerate the meat, put the bones back into the pot and cover with cold water.  

DSC00939DSC00941

Simmer for 30 minutes or so and then refrigerate for several hours or overnight to allow the fat to rise and solidify on top.  If you need to you can separate the bones from the broth and transfer to a smaller container but I’m not fond of washing more dishes than I need to, so I’m going to refrigerate it as is. 

DSC00942

Once the fat is at least semi-solid, skim it from the surface and put it into a small skillet (don’t worry if you take some broth with it).   My Jewish friends would call this schmaltz and even though it goes against the “eat less saturated fat principle”, it delivers great flavor to the soup. As long as you don’t over do it on a daily basis, I’m a believer in using the fat I render from the meats I am cooking.   Bring the stock with the bones to a simmer while you work on the rest of the mise en place.

DSC00957 DSC00959

For the remaining Dribbles & Drabs in my soup,  I’m using some carrots, onion, mushrooms (an addition because I had more than I needed for the cacciatore) , thyme (fresh today but dried is fine), bay leaf, celery seed (all out of fresh celery which I would normally use in chicken noodle soup),  the chicken I pulled from the bones, some dried egg noodles (on another day I might make fresh or even throw together some dumplings) and some fresh parsley. 

DSC00963

Slice and dice the fresh stuff.  Heat the chicken fat.

DSC00966DSC00964

Add the fresh stuff along with the dry herbs to the melted fat and cook until the carrots are slightly tender and the onion is translucent.

DSC00974 DSC00976

Strain the bones and skin from the simmering stock and discard (at this point you’ve taken as much from this chicken as it has to give).

DSC00968 DSC00970

You should have 6 to 8 cups of stock, if not add some water to make at least 6 cups.  Add the cooked vegetable mixture, the fresh thyme and the chicken to the pot with the stock and bring to a boil.

DSC00972DSC00978

Once the stock comes to a boil add the noodles and cook according to the package directions.  In the case of the noodle I’m using today that time is around 15 minutes.   The noodles I’m using are Mrs. Millers Old Fashioned Wide Egg Noodles (Extra Fancy Durum Wheat Flour, Fresh Whole Eggs, Water)-Fredericksberg OH.  I think they are quite good for a commercial noodle.   Be sure to taste for salt as you add the noodles, mine needed a teaspoon or so at this point.

DSC00983DSC00980

And there you are, a hearty Chicken Dribbles & Drabs Soup

DSC00985 DSC00987

Enjoy!

MB


What Do I Do with Those Leftover Chicken Parts Soup (Chicken Noodle Soup)

by: M.B. Einerson

Adapted from Rich Chicken Noodle Soup LA Times 1980’s

Servings: 4 to 6

  • Bony chicken parts from a whole chicken (2 or so lb.)
  • Salt and Freshly ground black pepper
  • Cold water to cover bones and skin after meat has been removed
  • Fat skimmed from the top of roasted/simmered chicken parts
  • 1 small or ½ of a large onion, diced
  • 2 medium carrots, diced
  • 2 stalks celery with leaves, sliced or ¼ tsp. celery seed
  • 1 oz. fresh mushrooms, sliced (optional but tasty)
  • 1 bay leaf
  • ¼ tsp. dried thyme or ½ tsp. fresh thyme leaves
  • Meat taken from roasted chicken parts
  • 4 to 6 oz. egg noodles
  • Salt and Pepper to taste
  • Minced parsley

Place bony chicken parts in oven safe dish such as a Dutch oven.  Sprinkle with salt and pepper.  Roast at 400° F for an hour or so, until chicken is nicely browned on all sides.  Remove from oven and let it rest at room temperature until the chicken is cool enough to handle.  Remove the meat from all of the bones and refrigerate,  return the bones and skin to the pot.  Cover with cold water and simmer for approximately 30 minutes.

Refrigerate the pot overnight or until the fat has risen to the top of the pot and is solid enough to remove.

Skim the fat from the surface and place in medium skillet or saucepan.  Bring the stock and chicken bones to a simmer.  Remove from heat and strain the stock to remove the bones and skin.  Add water to the stock if necessary to make 6 to 8 cups of liquid, return to the pot and set aside.

Heat the skimmed fat, add the onion, carrot, celery and bay leaf and sauté until the onion is slightly translucent.  Add the mixture to the soup stock along with the thyme.  Bring to a boil and add the noodles and reserved chicken meat.  Cook at a rolling simmer until the noodles are tender.  Depending on the type of noodle, this will take anywhere from 9 to 15 minutes. Season to taste with salt (you will likely need to add salt, so taste when you begin to cook the noodles so they will be seasoned) and pepper.  Remove from heat and sprinkle each serving with minced parsley.

Enjoy,

MB

Chicken Cacciatore

DSC00949

Whenever I pose the question to my husband is there anything you’re craving, the response nine times out of ten will be Chicken Cacciatore.  It’s a dish we’ve been making for nearly as long as we’ve been together.  It has a form of fried chicken as it’s base, so totally in my wheelhouse since the age of 9 or so.  It’s saucy, one of the base criteria for a great dish in my husband’s mind. Last but certainly not least is that it’s even better as leftovers than it is when freshly made.  So even if you are cooking for two make the entire recipe!  The other cool thing is that if you choose to make it with a whole chicken, you will have the makings for some great chicken noodle soup as well.

Over the years I’ve tried numerous variations,  all tasty, but when it comes right down to it, our favorite is based on the one we discovered so many years ago in the Betty Crocker’s International Cookbook.  As with most of the recipes we’ve made from this gem of a cookbook  it has ingredients that are and have been readily available in nearly every grocery store across the country since it was published in 1980. Yet, somehow each recipe seems to remain true to the spirit and flavor of it’s origins.  We made it for the couple who were to become my in-laws in Montevideo MN on the evening before we announced our engagement.  And believe me Montevideo was not the culinary capital of the US either then or now.        

The other aspect that makes me love this cookbook  so much is that the heading of each recipe gives a brief history or some insight into the recipe.  The recipe names are even subtitled with the name in the language  of it’s origin-in this case the recipe is Pollo alla Cacciatora which translates to Chicken Hunter’s Style in Italian.  The legend the heading explains, tells that it was invented by a hunter’s wife who’s husband returned home with only a few mushrooms and olives. I find it totally believable as I’ve witnessed first hand how inventive  Italian cooks are with a few simple ingredients…..(if you check Amazon I think you can still find copies for sale, I’ve given a copy to each of my children)

I’ve made this dish so many times, it now pretty much falls into one of those “cooking without a recipe recipes ” and can vary slightly depending on the ingredients I have on hand  i.e. what’s in the garden, refrigerator and pantry.  However, for this post I’ll  go back to the original and recreate it as written* and leave it to you to make it your own with the ingredients you have and your inspiration.   The next time it hits our table I’ll post it with the minor changes I’ve been making over the years that were never recorded.  For example it could use a bit more sauce and the addition of some wine is not without merit!  However,  the original that I give you here is pretty darn tasty just as it was back in 1980.

The ingredients are pretty simple and I’ve used everything from canned mushrooms (oh my I know -but in rural Minnesota in the 1980’s fresh were unheard of) and plain black olives because who ever heard of Kalamata.  And yes, I’ve even been known to use boneless, skinless chicken-don’t do it unless you are in an extreme hurry.  I’m convinced that good quality bone-in, skin on chicken that you cut up your self is worth the effort.  If you need a tutorial on cutting up a chicken see the post https://tablemb.wordpress.com/2015/05/18/mexico-city-enchiladas/  

DSC00914

For this recipe I started with a whole fryer that was close to 5 lbs. in weight.  After I cut it into leg and thigh portions and 7 portions  of breast (a wishbone, and each half into three pieces) I had around 2.75 lb of chicken for the Cacciatore.  Perfect for feeding 6 to 8 people or the two of us for at least three meals.  The remaining 2.25 pounds of composed of wings, back etc. will become chicken noodle soup.   That’s a lot of good food from a chicken that cost me $7.73

DSC00919

Next comes the mise en place for all of the flavorings-mushrooms (this time they are shitake but I’ve used white button and cremini over the years, all good), sliced kalamata olives, onion, garlic, whole peeled tomatoes in puree (today they are fire roasted because that’s what I had in the cupboard).   I much prefer whole peeled rather than  diced in a saucy dish like this,  they break down into a great sauce.  Just cut them up with some shears.  Onions, garlic and some dried herbs.  In a simmered dish like this I actually prefer the flavor of dried vs. fresh oregano 

DSC00928DSC00931

All of these are going in at once, so just put them in a bowl and set aside.  A little unusual not to sauté the onion,garlic and mushrooms before adding the tomatoes but it works!

DSC00933

The chicken pieces get dredged in the flour, salt and pepper mixture and then into a large pan with the olive oil.  If you don’t have a pan large enough to brown all of the chicken in an even layer with a little space between each piece, do it in batches.

DSC00923DSC00925

After the chicken is nicely browned on all sides but not cooked through, remove it from the pan and spoon off the excess fat.  Take care to leave all the little brown bits of flavor!

DSC00930 DSC00934

Add the chicken back to the pan and top with the all the remaining ingredients except the parsley.  Cover and simmer for around 30 minutes or until all of the chicken pieces are cooked through.

DSC00933 DSC00936

When the chicken is almost done, cook some long pasta.  Remember that excess olive oil and chicken fat you removed from the pan?  Use a bit of that to toss with the cooked pasta-it’s loaded with great flavor.  Remember, this is a sometimes dish, you can go for just olive oil for the everyday food.

DSC00945DSC00946

Sprinkle the chicken with some chopped fresh parsley and pour some light red wine.

DSC00944 DSC00950

So saucy and flavorful, no wonder it’s made it’s way to my table for over three decades!!

DSC00954 DSC00953

I hope you enjoy it as much as we do.  

buon appetito

MB

Chicken Cacciatore

by: M.B. Einerson

Ever so barely adapted from Betty Crocker’s International Cookbook

Servings: 6 to 8

  • ½ cup all-purpose flour
  • 1 tsp. salt
  • ¼ tsp. pepper
  • 1 ½ to 3 lb. broiler-fryer chicken, cut up
  • ¼ cup olive or vegetable oil
  • 1 can (16 ounces) tomatoes *
  • 1 can (8 ounces) tomato sauce
  • 1 cup mushrooms, sliced
  • ¼ cup water (plus a little more to rinse out the cans of tomato products)
  • ¼ cup sliced pitted ripe olives
  • 1 medium onion, chopped
  • 2 cloves garlic, crushed
  • 1 tsp. salt (this one  thing I did omit, as I find older recipes to be a bit high in salt for my taste these days-so leave it out and the add some at the end if you feel it needs it)
  • 1 tsp. crushed oregano leaves (Greek, Turkish etc. not Mexican)
  • ¼ tsp. pepper
  • 1 bay leaf
  • Snipped parsley
  • Hot cooked spaghetti

Mix flour, salt and pepper.  Coat chicken with flour mixture.  Heat oil in 12-inch skillet or Dutch oven until hot.  Cook chicken over medium heat until brown on all sides, about 15 minutes.  Drain fat from skillet.

Mix tomatoes, tomato sauce, mushrooms, water, olives, onion, garlic, salt, oregano, pepper and the bay leaf; break up tomatoes with fork.  Pour over chicken.  Heat to boiling, reduce heat.  Cover and simmer until thickest pieces of chicken are done, about 30 minutes.  Sprinkle with parsley; serve with spaghetti.

* the only thing to note is that there has been a bit of slippage in can volumes between 1980 and now.   The original recipe uses 1 can (16 ounces) tomatoes which have become a 14.5 ounce can!!   In this case I actually weighed the 16 ounces from a 28 ounce can so I could be precise-but normally I would simply throw in the entire 28 ounces.

buon appetito

MB

Banh Mi (Vietnamese/French Sandwich)

DSC00910

There’s just something about the marriage of two great cuisines that makes for great food and I think that Banh Mi Sandwiches are one of the finest examples.  I had the good fortune to live in Los Angeles during the time when Wolfgang Puck and California Pizza Kitchen were making wild pizzas and Puck opened a marvelous fusion restaurant named Chinois on Main where the mini crème brûlèes served on the lazy susan were flavored with  all sorts of Asian flavors and were small enough that you could try them all.  Ever since that time I’ve been a fan of exploring the possibilities of taking the best ingredients and techniques of cuisines that seem worlds apart but when brought together make  unique and amazing new dishes.

I can’t recall exactly when I had my first Banh Mi Sandwich but I was obviously hopelessly hooked on them because if a sandwich shop or kiosk has them on the menu  I’m in!  BTW this  also goes for crab cakes, moules frites, sweetbreads (not the pastry) and phad thai!

So what is this sandwich I’m raving about?   It starts with some bread that is crispy on the exterior with a open texture on the interior, a luscious protein or two, some spicy mayo, some quick pickled veggies, a bit of thinly sliced spicy pepper and if you want some lettuce and tomato.  The possibilities are endless.  I’ve had them with chicken, spicy meatballs and grilled beef and can even imagine them with tofu and avocado.  The only thing I would insist on is that there is some fish sauce in the quick pickle brine.  The umami ness it brings is what pulls all the flavors together to make the unique flavor of Bahn Mi

So let’s start with the quick pickle.  Like I said the essential ingredient is fish sauce, then you need a bit of sweet (I like light brown sugar), some acid (unseasoned rice vinegar and/ or lime juice) and a bit of soy sauce for salt and flavor.  Next comes something to pickle.  When I get daikon in my CSA bag I know there is a Banh Mi sandwich in my future.  If you’re not familiar with daikon, it’s that long white root on the right in the photo below.  It has a mild radish flavor and is great eaten raw or roasted.  The round root  vegetable with the bright pink interior next to it is a watermelon radish which is also in the daikon family.  They both add great flavor and texture to the pickle.  Carrot and sweet onion round out the pickle ingredients today, but feel free to experiment!

DSC00877DSC00883

Sometimes I grate the veggies on a box grater or in my food processor but I’ve decided that I actually prefer to making shavings with my trusty “y” peeler for the carrot and white daikon and to cut ” julienne” pieces of the watermelon radish and onion with my chef’s knife 

DSC00886 DSC00888 DSC00889 DSC00890

Stir the veggies into the brine and set it aside while you go to work on the rest of the sandwich.

DSC00892 DSC00894

So what’s a sandwich without a little mayo.  For a Bahn Mi the mayo should be a bit spicy.  I’ll give you ratios but remember that this is your sandwich, so make it as mild or spicy as you like.  Today I’m using a combo of Sambal Oelek and Sriracha but  feel free to use whatever hot sauce you may have in your refrigerator (yes good old Tabasco or Franks would work and next time I’m thinking of trying the gochujang I just acquired)

DSC00896

Now for the meat of the matter.  I’ve been dreaming of this sandwich for a while, so I had the liverwurst on hand.  For me this is where the marriage of French and Vietnamese flavors shine.  The richness of the “pâté” against the sweet vinegary bite of the pickle and the crusty bread is a food marriage made in heaven.   The roast pork (more on this later) brings more substance and flavor to each bite.

If you’re not a pork person some chopped chicken liver with some roasted or grilled  chicken would be awesome and I’m thinking that for my vegetarian friends, some mashed avocado and some sauteéd tofu or grilled tuna could be mighty fine as well.  

DSC00897

The pork loin I’m using is leftover from the roasted bone-in pork loin with roasted winter vegetables I made this weekend.   It is a seriously (pun intended) a great recipe, starting with excellent pork from BluesCreek Farms and a reverse sear method of cooking.  

http://www.seriouseats.com/recipes/2015/11/rack-of-pork-loin-roast-recipe.html

http://www.BluesCreekFarmMeats.com

Now we’re almost ready to build this sandwich.   Today I’m also switching out the customary  baguette for a different style sandwich bread that I’ve recently discovered.  It’s a Torta sandwich roll from La Brea Bakery in LA and sold at Costco.   So, in comes bread from yet another culture.  I’ve also seen it in store bakeries labeled bolillo.   It works well for this sandwich because like its French cousin, it has a crispy exterior and a soft interior for soaking up all the juices and flavors in the sandwich.   A ciabatta would work beautifully also.    In addition to the pickled veggies in the sandwich I’m going to include some slices of tomato, romaine lettuce leaves, thinly sliced jalapeno and cilantro sprigs. 

DSC00900 DSC00901

Start by spreading a thin layer of the liver sausage on the bottom slice of toasted roll, add a couple of thin slices of roast pork.

DSC00903DSC00905

Top with some of the pickled veggies, thinly sliced jalapeno, cilantro, tomato and lettuce.  Spread the top half of the roll with the spicy mayo and press down firmly!

DSC00906 DSC00907

You can eat it as is, but I prefer to wrap it tightly in foil and heat in a 350° F oven for 10 minutes or so until it’s heated through.

DSC00908 DSC00909

Now all you need is a cold one and then a nap!  I like to serve it with some of the pickled veggies on the side and of course it tastes so much better if it’s served on a hand-crafted cutting board (thank you Katy).

DSC00912

Chúc ngon miêng & Bon Appétit 

MB

Pork Banh Mi

by: M.B. Einerson

Adapted from Bon Appétit January 2010 – Pork Meatball Banh Mi, Cooking Club April/ May 2011–Warm Vietnamese Pork Sandwiches and Gourmet February 2008 Vietnamese Chicken Sandwich (Banh Mi)

Servings: 4 hearty sandwiches

  • ¼ cup unseasoned rice vinegar
  • 2 Tbsp. lime juice
  • 2 Tbsp. light brown sugar
  • 1 Tbsp. fish sauce
  • ½ tsp. soy sauce
  • 1 ½ to 2 cups coarsely grated carrots
  • 1 ½ cups coarsely grated daikon
  • ½ to 1 cup julienned watermelon radish (optional but pretty)
  • ½ large sweet onion, thinly sliced
  • Baguette cut into 4 pieces and split lengthwise or 4 Torta or Ciabatta rolls split and toasted
  • 8 to 12 thin slices cook pork loin/tenderloin
  • ⅛ to ¼ lb. liverwurst or liver pâté
  • ¼ cup mayonnaise
  • 2 to 3 tsp. hot chili garlic sauce (sriracha, sambal oelek etc.)
  • 1 to 2 jalapenos, thinly sliced
  • Cilantro sprigs
  • Romaine lettuce leaves
  • Tomato slices

Whisk rice vinegar, lime juice, brown sugar, fish sauce and soy sauce in a medium bowl.  Add grated carrots, daikon, radish and onion.  Mix well and set aside.

Combine mayonnaise and hot chili garlic sauce.

Spread the bottom of each sandwich with a thin layer of the liverwurst.  Top with pork, some of the carrot/radish/onion mixture (save additional for serving alongside the sandwich), jalapeno, cilantro sprigs, lettuce leaves and tomato slices.  Spread the top of each sandwich with some of the mayonnaise/hot sauce mixture.  If desired, wrap tightly in aluminum foil and heat in 350°F oven until warmed through.

Chúc ngon miêng & Bon Appétit

MB


Dolmades Rice

DSC00875

Hello again!!!  I haven’t stopped putting food on the table but the end of summer caught up with me – produce to harvest, trips to take, classes to teach … and then came the holidays.  Somehow writing about and taking pictures of the dishes we were enjoying fell to last priority and here it is almost the end of February.  But now I’m determined to get back into the swing of sharing our family favorites.

To begin again it’s going to be pretty simple!  Dolmas or its plural form Dolmades ( Stuffed Grape Leaves) are one of the foods that my daughter and I typically enjoy during the Christmas holiday at one of our favorite restaurants-Cafe Istanbul.  This year we didn’t have time for that meal but we did manage to make a batch of Dolmades and Tzatziki Sauce to take to a Christmas Eve gathering with friends.   As often happens when making a stuffed dish, we ran out of wrappers (preserved grape leaves in this case) before we ran out of filling.   What we realized as we devoured the extra filling for lunch was that this rice filling was awesome on its own.  So I’m adding it to my repertoire of great dishes to pair with grilled meat or simply to enjoy on its own.  Someday I may go back and include the process of wrapping and steaming it in grape leaves but today it’s Domades Rice for lunch.  It would also be a great side dish with the  Goat(Lamb) Meatball Kabobs with Tzatziki Sauce that I shared with you earlier, or grilled chicken or pork or……

So here we go!  The original recipe uses white long grain rice but I love the flavor and texture of steamed Basmati.  A trip to the grocery store was necessary for this one as my mint and dill are now under a light blanket of snow but spring is just around the corner and soon I’ll be able to whip this one up with ingredients that are always in my pantry, freezer and refrigerator.

DSC00845

 Start by putting the Basmati Rice in a fine mesh strainer and rinsing under cold water until the water runs clear.  Then put the rice into a rice cooker along with the water indicated on the package and steam.  If you don’t have a rice cooker, simply follow the instructions on the package of rice but I highly recommend adding a rice cooker to your kitchen if you don’t have one!  It takes all the guesswork out of steaming rice perfectly and allows you to concentrate on the other components of dinner without the stress of watching the rice.  

DSC00847DSC00850DSC00851DSC00852

Rice cookers/steamers come in all sizes and price ranges, but to be honest I’ve had great success with the simplest and least expensive models.

While the rice is steaming you can move on to the rest of your mise en place.   The timing should be just about perfect if you’ve been practicing your knife skills.

At this time of year, some of my garlic is starting to get those little green sprouts inside. Simply slice it in half and use the tip of your knife to remove it (it can be a bit bitter).

DSC00856

Finely dice the onion, mince the garlic, mint and dill, zest and juice the lemon. 

DSC00858DSC00862

 Half a lemon is just about a Tablespoon full.  But remember, this isn’t baking, so a bit more or less of any ingredient is ok.

DSC00860

Toast the pine nuts in a dry skillet until lightly toasted and browned.  

DSC00855

When the nuts are nice a toasty, add the olive oil and onions to the skillet and saute until the onions are soft and translucent.  Then add the garlic, give it a stir and add the cooked rice which should be ready and waiting for you.  If it’s not quite done, remove the skillet from the heat until it is.  Burnt garlic is not tasty!!!

DSC00864 DSC00865

DSC00866DSC00867

Stir in the lemon juice, zest, mint and parsley.  Add salt and pepper to taste.

DSC00869

And as easy as that, lunch is served!

DSC00874DSC00876

Kali órejsu!

MB

Dolmas Rice

by: M.B. Einerson

Adapted from Rice Stuffed Grape Leaves (Dolmas)  with Tzatziki Sauce from Sur la Table Great Greek Cooking Class 

Servings: 4 to 6

  • 1 cup Basmati rice
  • 1 ½ cups Water
  • 2 Tbsp. Extra virgin olive oil – use a really tasty one for this one
  • ½ cup Pine nuts
  • 1 cup diced Onion or shallot
  • 1 tsp. minced Garlic
  • 2 Tbsp. Fresh dill, chopped
  • 2 Tbsp. Fresh mint, chopped
  • 1 tsp. Lemon zest
  • 1 Tbsp. Fresh lemon juice
  • Salt and freshly ground black pepper to taste

Place the rice in a fine mesh strainer and rinse under cold water until the water runs clear.  Place rice and water in a rice cooker and steam.  If you don’t have a rice cooker follow the instructions on the package of rice you are using (but I highly recommend rice cookers :-).

In a medium skillet on medium heat, toast the pine nuts until lightly browned.  Add the olive oil and minced onion sauté until the onion is translucent.  Add the minced garlic, stir and remove from heat.

Stir the steamed rice into the onion mixture and then stir in the lemon juice, zest, dill, mint and salt and pepper to taste.

Kali órejsu!

MB


Pimento Cheese and Toasted Pimento Cheese & Tomato Sandwiches

DSC00833

Before the season ends and I’m back to canned tomato products, one of the things on my summer must eat list is a simple  Toasted Pimento Cheese & Tomato Sandwich.  Some hearty bread, good pimento cheese and a thick slice of vine-ripened tomato are all that’s required for a satisfying lunch or dinner.

Recently I made the food for a fairly large wedding shower/cocktail party.  It was pretty exhausting and made me realize how much caterer’s should be appreciated when they make food from scratch rather than relying on commercially produced stuff to fill their orders.  Good food doesn’t need to be fancy or fussy but it does need to be fresh and prepared with high quality ingredients.  So it wasn’t so surprising to me when one of the most commented on items on my menu was a simple Pimento Cheese Spread served alongside toasted baguette and celery sticks.  So much easier to prepare than the fussy Watermelon Gazpacho with Feta Crema served in martini glasses, and the second bonus was that there were leftovers to be enjoyed the next day while cleaning up after the party.

Pimento Cheese Sandwiches were one of those things I grew up with and found to be just an ok kind of thing,  but it was often made with pasteurized processed cheese, salad dressing, generic canned pimento peppers and slathered onto what I have come to refer to as Wonder Fluff.  It wasn’t until I grew up and discovered aged cheddar cheeses, mayonnaise and roasted Piquillo peppers that  Pimento Cheese became one of those ” sometimes” foods to be savored.   A sometimes food because ,it’s not low in calories, saturated fat  or sodium for sure, but for an occasional meal with homemade whole grain bread and a thick slice of tomato I’ll make the sacrifice and cut those calories somewhere else.

In the past I’ve made this sandwich as a “Grilled” sandwich, meaning that in addition to the fat from the cheese and mayonnaise I added butter to mix as in a Grilled Cheese Sandwich.  So as at least a small  nod to cutting a bit of the saturated fat in the sandwich,  I decided to simply toast the bread and build the sandwich with modest amounts of my lovely Pimento Cheese and an extra thick slice of tomato.  Funny thing is,  I think I liked it even better than my old stand by.   I don’t think it will make it to the pages of Cooking Light but every calorie saved is one I don’t need to burn.

The inspiration for this recipe was Pimento Cheese Toasts that appeared in the January 2008 issue of Gourmet magazine.  I’ve used it for New Year’s Eve and Derby Day parties in it’s original form and then as a cold spread as I mentioned as an easy make ahead item for a cocktail party.  This week I’m just enjoying it made into a sandwich with tomatoes or on toast with a slice of tomato for breakfast.

The ingredients for the spread are simple so the quality really counts.  I use a combination of sharp or extra sharp (aged) white cheddar (Cabot Vermont is one of my favorites) and sharp or extra sharp yellow cheddar.  White pimento cheese would just seem weird, so the combo gives me the color I want with the great flavor of an excellent white cheddar.  I’ve replaced the cayenne pepper in the original recipe with chipotle powder and the generic roasted red peppers with roasted Piquillo Peppers.   Only Hellmann’s Real Mayo makes it into my refrigerator. 

DSC00801 - Copy

When I’m grating this much cheese I pull out the food processor and the coarse grating blade.  

DSC00805 DSC00808

Pat the peppers dry

DSC00809

Two piquillo peppers with give you approximately 1/4 cup of diced pepper.  If you love the flavor feel free to add a bit more or you can do as I will and add more to the sandwich.

DSC00813

Mix the cheese, mayo, peppers and chipotle or  cayenne pepper ( if you like it spicy up the amount to 1/4 teaspoon or more to taste).  It needs to sit in the refrigerator a bit to allow the flavors to blend, but it’s essentially party ready as a lovely spread at this point.

DSC00816 DSC00818

Now I’m ready to build my sandwich.  This week I was ambitious and made my own bread (Harvest Wheat from the King Arthur website and baked in a Pullman pan so I have great sandwich slices.  

DSC00822

More piquillo pepper patted dry, a thick slice of vine ripened tomato and a splash of awesome Lombardi Balsamic Vinegar.

DSC00823 DSC00824

I have a new toy  in my kitchen (a Wolf countertop oven that works as a toaster) that makes making a toasted sandwich super easy.  The bread toasts and the cheese gets just slightly warm.  If you simply toast two slices of bread and work quickly you can achieve nearly the same effect.  Or you could dry toast the sandwich in a skillet.

DSC00826

Toasted bread and warm gooey cheese-oh yum!

DSC00827

All I need for lunch is a few more slices of those luscious vine ripened tomatoes from my garden.

DSC00837

Enjoy!

M.B.

Pimento Cheese

by: M.B. Einerson

Adapted from Pimento Cheese Toasts Gourmet Magazine January 2008 

Servings: approximately 2 cups – enough for 6 to 8 sandwiches or 36 hors d oeuvres on baguette slices

  • 10 oz. sharp or extra sharp Cheddar cheese, coarsely grated (I like a combo of white and yellow cheddar
  • ⅛ to ¼ tsp. chipotle powder or cayenne pepper
  • ⅛ tsp. freshly ground black pepper (optional)
  • ¾ cup mayonnaise
  • ¼ cup finely diced roasted Piquillo peppers, patted dry before dicing.

Mix all ingredients and refrigerate until ready to serve.

Serve with celery stalks or toasted baguette slices or spread on baguette slices and broil until the cheese is bubbling and browned.

Turn into a toasted sandwich with a hearty wheat bread, tomato slices and extra Piquillo peppers


Enjoy,

M.B.

Potato & Cheese Stuffed Poblanos

DSC00791

Potato & Cheese Stuffed Poblanos -oh yum!  It’s been an unusual growing season here in central Ohio. By this time in the season I’m usually roasting Poblano Peppers to freeze and searching for yet another recipe to add to my growing collection. This year I’ve waited and watched my plants develop a few peppers and have just finally  harvested enough of my favorite peppers to make one dish. Now the dilemma, which one will it be?? In the end it’s determined by another favorite vegetables  – the potato and of course the potatoes will come from my CSA bag.

My earlier post on Crema de Chile Poblano taught you how to roast peppers on a gas range.  Today I’m taking the speed approach and using our gas grill.  It has an additional time-saving element because it’s a task that my husband is great at.  So,  while I do the rest of the prep, he’s out on the deck roasting my precious peppers.

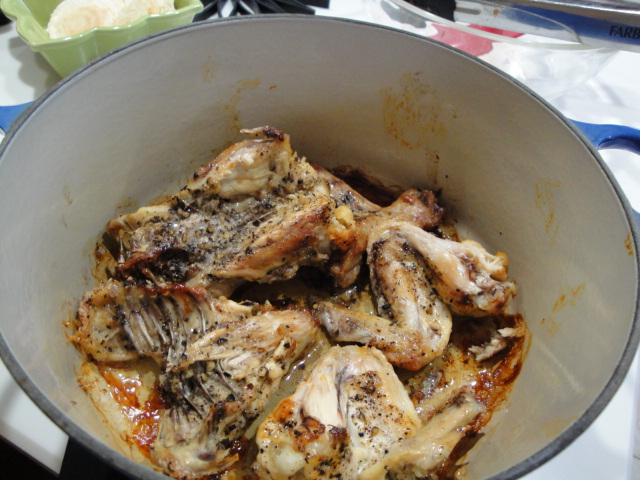
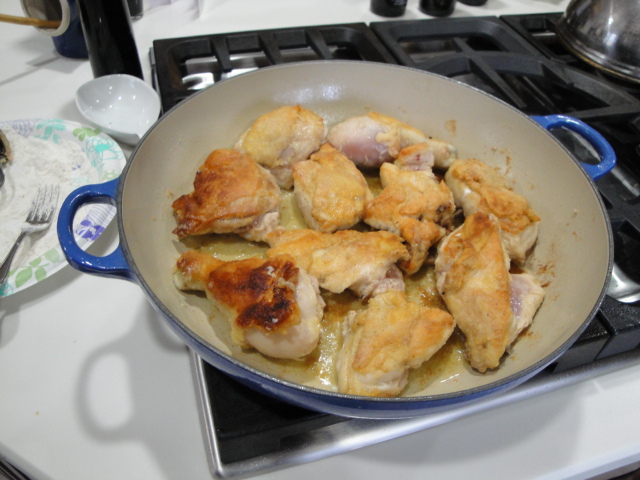
The recipe originates from a February 2011 Cuisine magazine article on Meatless and Delicious and that it certainly is.  In the article the stuffed peppers are paired with a Black Bean Sauté which is also delicious but for tonight’s meal I’m pairing them with some simply grilled boneless, skinless chicken thighs and fresh off the vine cherry and grape tomatoes.  Our dog looks sooo sad because he knows that although he can enjoy the aromas, he won’t be getting a bite!

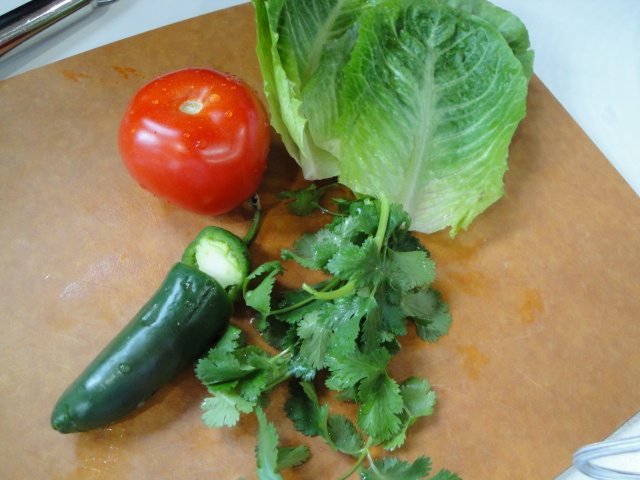
So finally I get to pick some peppers!  Certainly not a peck but enough for dinner.

DSC00760

The jalapeno comes from my “garden” as well.

DSC00765

The peppers go on the grill while I take care of the remaining tasks-so sad that there are so few of them.  Usually the grill is filled.

DSC00770

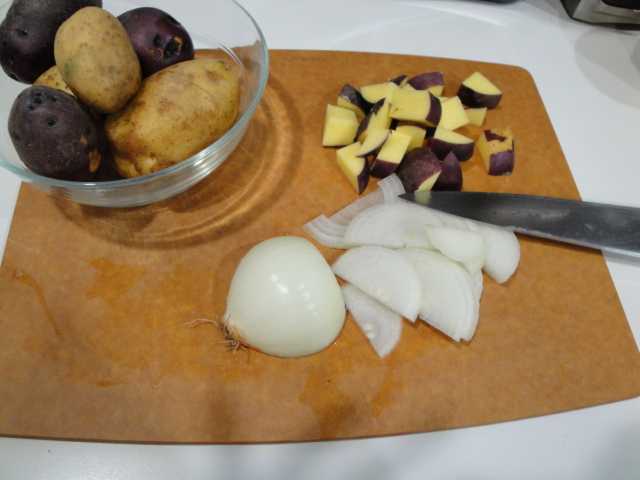
I’m using a combo of “red” skinned (Blue Gold from Wayward Seed Farms)  and white potatoes (Kennebec from Dangling Carrot Farms),  but in this recipe most any type of potato will work.  But,  remember the better quality the ingredients, the better the dish. So if at all possible look for some high quality potatoes at your local farmers market.  

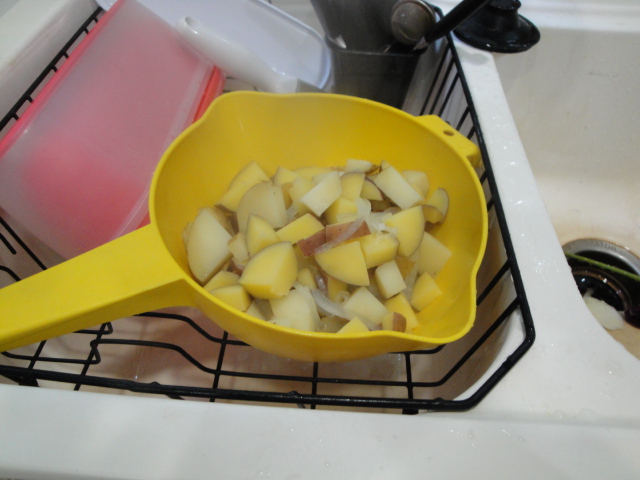
 When I’m making mashed potatoes, I usually want a russet like variety, but in this recipe they will be more of a smash, so even potatoes that are of the waxy variety will be fine.  It’s a dice for  the potatoes and a slice for the onion. 

DSC00766

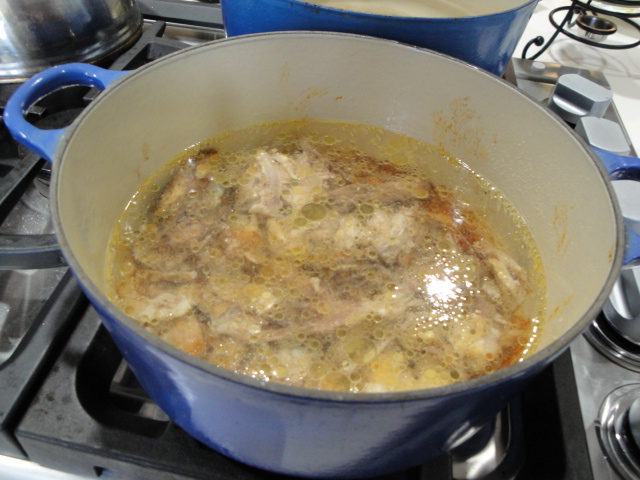
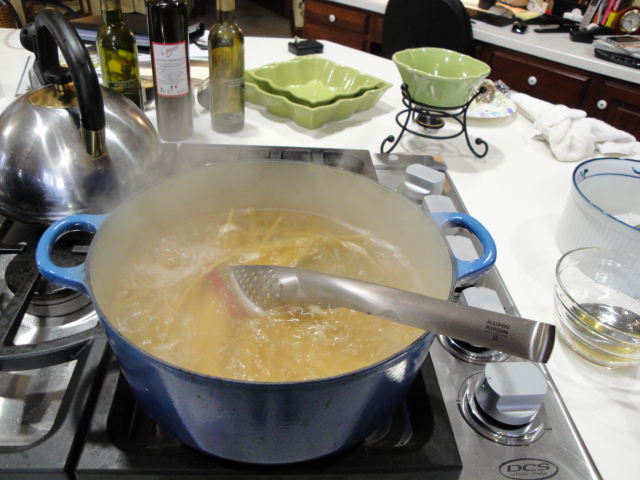
Into a pot of salted water they go.  Always start potatoes in cold water so the will cook evenly.

DSC00767

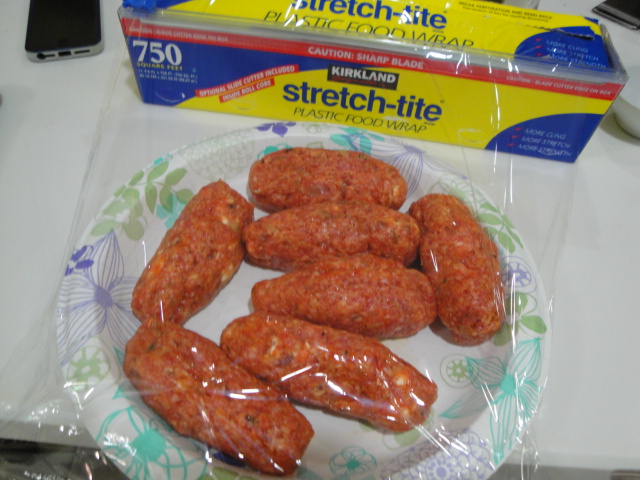
The charred peppers go into a bowl and get covered with plastic wrap to steam.  This loosens the skins, making them easy to peel.

DSC00775

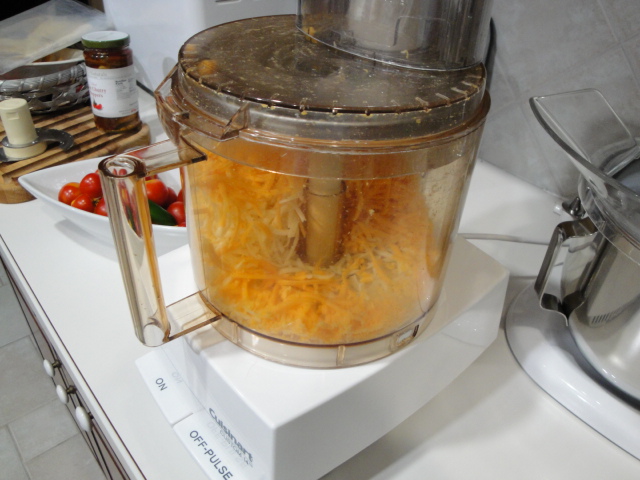
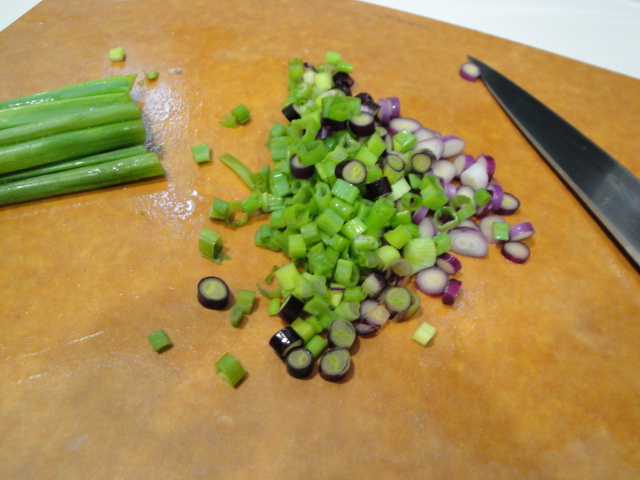
While the peppers are steaming, slice the scallions and grate the cheese.  Check out those beautiful purple scallions from Clay Hill Farms.   Use both the white/purple part and the green stems.   I forgot the shot for mincing the jalapeno, but you should be doing this now as well.

DSC00776 DSC00778

DSC00772

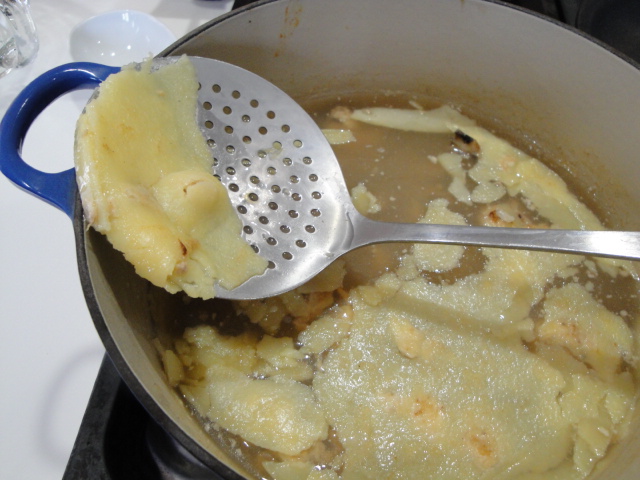
When the potatoes are tender, drain and return to the pot over high heat just for 30 seconds or so to evaporate the excess moisture.

DSC00779 DSC00781

The peppers should be cool enough to handle after 10 minutes.  So pull the blackened skin off (remember not to rinse the peppers, you want all of that lovely roasted flavor to remain), cut a slit on one side and remove the seeds and tough veins and set aside.  

DSC00782

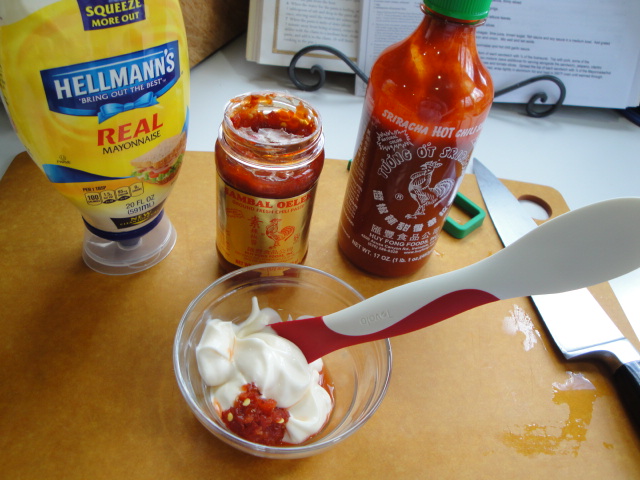
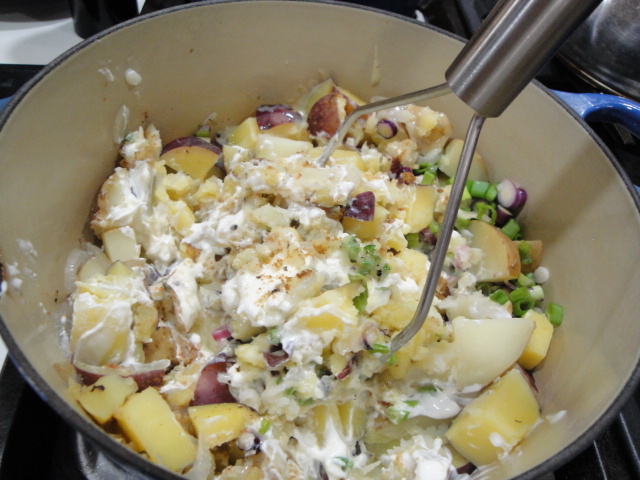
Add approximately 3/4 of the shredded cheese, the scallions, jalapeno, cream cheese, sour cream, garlic powder and cumin and mash/smash.  I like mine on the chunky side but if you like smooth just keep on mashing until you get the texture you like. Taste and season with salt and pepper and lime juice if you like.  If you salted the potato water well you shouldn’t need any additional salt. 

DSC00783 DSC00784

Generously fill the peppers and place them on a parchment or foil lined baking sheet.  Top each one with some additional shredded cheese. 

DSC00785

Bake for 20 minutes or so until the the cheese is melted and golden brown.

DSC00790

Because a couple of my peppers were pretty small I had some leftover potato ( ya hoo-a start for tomorrow nights dinner).  So I oiled a small baking dish, filled it with the potatoes, topped it with some cheese, covered it with plastic wrap and into the refrigerator it went.  An alternative would be to make little mounds of potato on the sheet pan with the potatoes, top with cheese and bake.

DSC00786 DSC00787

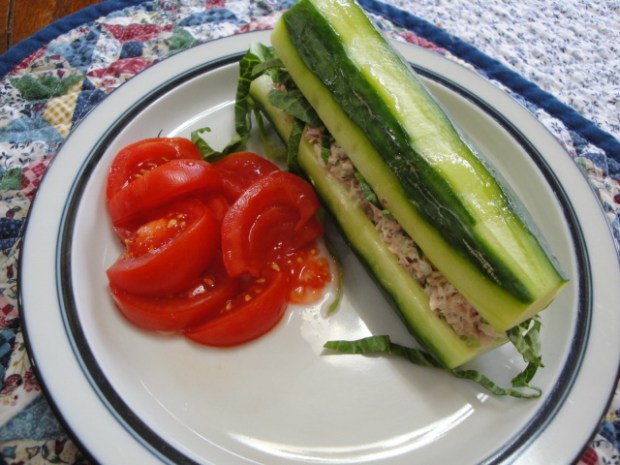
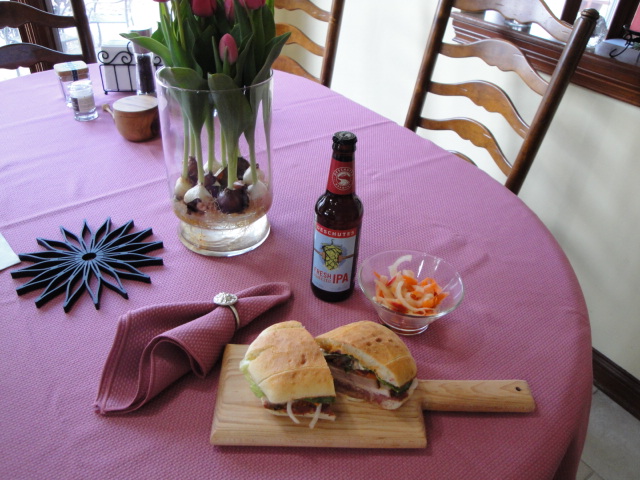
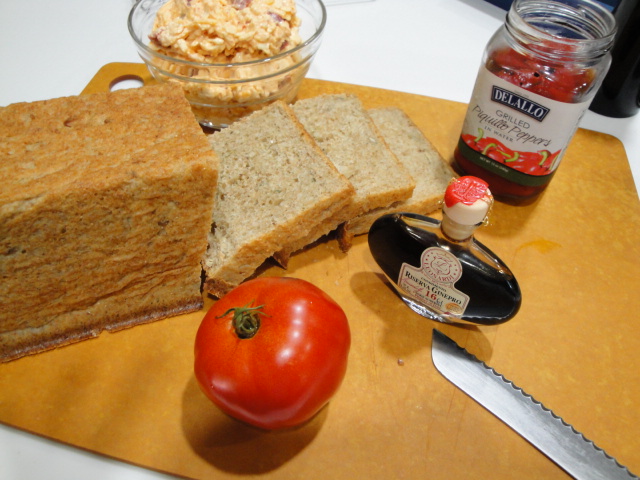
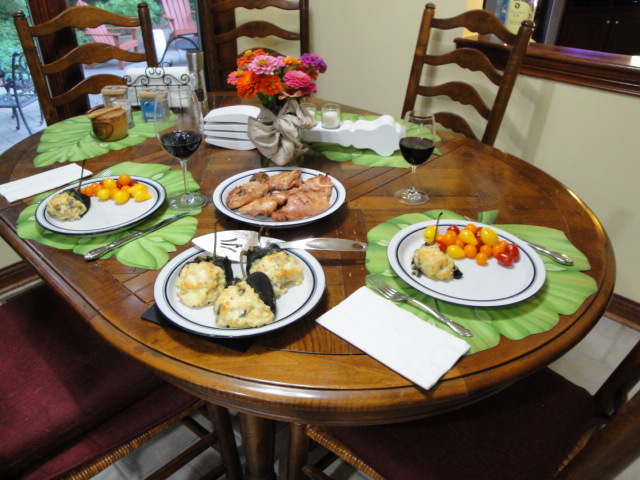
If you’re having a meatless day, a side of Black Beans (there’s a very nice recipe for Black Bean Sauté that accompanied the original recipe in Cuisine) is all you need for the center of the plate.  Tonight I’m pairing mine with a grilled boneless, skinless chicken thigh and a handful of cherry (Sun Gold) and grape tomatoes from my CSA and garden.  And of course a glass of wine!  The flavors here are bold enough for a light red.  The contrast of the warm, earthy stuffed peppers and the bright fresh flavors of the cherry tomatoes (no need for any embellishment on them) makes for a fine late summer meal.

Buen apitito!

M.B.

DSC00795DSC00794

DSC00792

Potato & Cheese Stuffed Poblanos

by: M.B. Einerson

Adapted from Cuisine- Potato-Stuffed Poblanos with Monterey Jack Cheese February 2011 

Servings: 4 (plus some potential leftover potatoes for another meal)

  • 4 large poblano chiles
  • 24 oz. potatoes, cubed, about 2 cups
  • 1 cup sliced onion
  • 1 ½ cups shredded Cheddar or Monterey Jack or Pepper Jack cheese, divided
  • ½ cup scallions-white and green parts, thinly sliced
  • 6 Tbsp. ( 3 oz.) cream cheese
  • 1 Tbsp. jalapeno chili, seeded and finely diced
  • 2 Tbsp. sour cream
  • 1 to 2 tsp. garlic powder
  • ½ tsp. ground cumin
  • 4 tsp. lime juice (optional)
  • Salt and freshly ground black pepper to taste.

Preheat oven to 425° F.  Line a baking sheet with parchment paper or foil.

Roast poblanos over a gas burner or on grill until skins blacken.  Alternative if you only have an electric stove to work with is to roast the peppers under the broiler until they are charred and blistered.

Transfer the roasted peppers to a glass bowl, cover them with plastic wrap and let them steam for 10 minutes or so.  Once they are steamed enough to loosen the skins and they are cool enough to handle.  Peel the blackened skin off (don’t rinse), cut a slit along one side of the pepper and remove the seeds and any tough veins.  Set aside.

Put the cubed potatoes and sliced onion in a pot of salted cold water, bring to a boil and cook until the potatoes are tender.  Drain and return them to the pot to allow the moisture to evaporate.

Add approximately ¾ of the shredded cheese, scallions, cream cheese, jalapeno, sour cream, garlic powder and cumin to the pan with the potatoes and mash to the consistency you prefer.  Stir in lime juice if you like and then taste and season with salt and pepper (if you salted the potato cooking water well, you shouldn’t need any additional salt.)

Fill the prepared poblanos with some of the potato mixture, top with shredded cheese and place on the baking sheet.  Bake for 20 minutes or so until the cheese is melted and golden brown.  If you have extra potatoes that you can’t fit into the poblanos, put them into an oiled baking dish, top with cheese and plastic wrap and refrigerate for tomorrow night’s dinner.  Alternative would be to spoon the potatoes into little mounds on the same baking sheet with the poblanos, top with cheese and bake alongside the peppers.

Buen apetito!

M.B.

Greek Salad

DSC00752

A simple Greek Salad is another perfect side to the Goat Meatball Kabobs from last weeks post.   As is often the case these days, when I cook there are leftovers.  Rather than simply repeat the meal, I try to switch it up a bit  so I seems like we’re having something entirely different. This is where  today’s Greek Salad come in.  The flavors are light, bright and fresh against the rich meaty goodness of the Goat Meatball Kabobs.  If you don’t have any Goat Meatballs, it’s a great lunch on it’s own or a side salad with any grilled or roasted chicken, burger etc.

The recipe is one I had almost forgotten about from Phase One of our South Beach diet days.     It was so good that in those South Beach days I often took it to potlucks in the neighborhood or work and no one ever suspected it was “diet” food.   It’s also perfect for the season as it highlights the bounty of cucumbers and tomatoes coming from my garden.

If you don’t have the lettuce, the salad of just cucumbers, tomatoes, onion and feta with the lemon, olive oil and oregano vinaigrette is awesome as well.

DSC00739

Start by whisking the lemon juice, oregano and salt  and olive oil together in a small bowl. Hold back on the salt if your planning to add olives, pepperoncini or other salty ingredients. 

DSC00742

Add the thinly sliced onion and set aside.  This little soak will take the sharp edge from the onion and give the oregano some time to hydrate.

DSC00743A

Tear and spin the lettuce.  A salad spinner is your best friend if you love crispy greens in you salads.

DSC00746

Peel and seed the cucumber.  If your using an English cucumber (those long skinny ones that come wrapped in plastic in the grocery store) you can skip the seeding step.   A spoon is the best tool for removing the watery, seedy center from “American” cucumbers.

DSC00748

Cut tomato or tomatoes into bite size pieces.  Even if you’re using a large tomato I don’t recommend removing the juice and seeds because that’s where most of that great tomato flavor resides.

DSC00750

Place the lettuce, cucumber, tomato and feta and any other optional ingredients you like in a large bowl.  Pour the vinaigrette over the top and give it a good toss.   

DSC00752

Lunch is on the table! 

DSC00755

After I sat down to enjoy this one I remembered that I had some leftover olive oil toasted ciabatta slices and added them to the mix as well to turn this one into Greek Panzanella

Greek Salad

by: M.B. Einerson

Adapted from The South Beach Diet Arthur Agatston, M.D. 2003

 Servings: 2 as a light lunch entrée or 4 as a side salad

  • 2 Tbsp. extra-virgin olive oil
  • fresh lemon juice (usually ½ of a medium to large lemon)
  • 1 tsp. dried oregano (Turkish is best for this salad)
  • ½ tsp. Kosher salt (optional if you’re cutting back on sodium-there is plenty in the feta)
  • ½ cup thinly sliced red onion (1/4 of a medium onion)
  • 4 cups crisp salad greens (approx. 8 romaine leaves, torn into bite size pieces)
  • 1 cucumber, peeled, seeded and sliced (if your using an English cucumber you can skip the seeding part)
  • 1 large tomato, chopped or 1 ½ to 2 cherry or grape tomatoes halved ( I usually go high)
  • ½ cup (3 oz.) crumbled feta cheese (reduced fat if you want to keep the calories from fat low)
  • Garnish with Kalamata olives or Pepperoncini Peppers (optional)
  • If you want to make it a bit more filling as a lunch you can add cubes of French Bread or Ciabatta rubbed with a bit of olive oil and toasted and the salad becomes a Greek “Panzanella”

Whisk the oil, lemon juice, oregano and salt in a small bowl.  Add the sliced red onion and let it marinated while you prep the remaining ingredients.

In a large bowl, combine the lettuce, cucumber, tomato and cheese.  Pour the dressing/onion mixture over the salad mixture and toss until coated.  Garnish with olives and/or pepperoncini if desired (just remember these will also add to the sodium level in the salad.

Kalí óreksi!

M.B.

Goat Meatball Kabobs with Tzatziki Sauce

DSC00735

Have I mentioned I love my CSA’s!  Community Supported Agriculture for those of you who may not have discovered them are not only important from an economic and sustainability standpoint, the food you get from these producers simply tastes better.  I get most of my produce from Great River Organic and meat from a custom CSA from Bluescreek Farms.  The celery I got in this weeks bag actually has flavor and the pork from Bluescreek  is nothing like “the other white” meat sold in the big chain groceries.  The other thing I love about them is that they challenge me as a cook.  Each bag or bundle makes me feel a bit like I’m on Chopped.  Ok, so, I don’t get challenged by having to combine sea urchin with grape jelly but I do have the opportunity to step a bit outside my comfort zone with things like  the star of this weeks post, ground goat.  Actually ground goat isn’t very scary at all, it’s just ground meat with a tad more flavor and less fat  than ground beef.   I could put it in tacos or chili but a quick search online gave me a recipe for Billy Goat Meatballs.  The source is a NPR Kitchen Window Post by Bonny Wolf and her recipe was an adaptation of a recipe from The Meatball Shop Cookbook.  I’ve had some pretty fine meatballs at The Meatball Shop in Brooklyn, so I decided to put my spin on these for tonight’s dinner.  If you aren’t lucky enough to have access to ground goat, I’m thinking that some lean ground lamb or beef would be great as well.

The only special ingredients,  meaning  that I don’t always have them on hand are the ground goat and the goat cheese.  Everything else I expect you may have in your pantry as well.  Don’t skip the goat cheese, it gives a great layer of flavor and keeps the kabobs from being dry little pucks.

DSC00691

Start by finely dicing/mincing half of an onion and a clove of garlic and stripping the leaves from a few sprigs of fresh thyme (if you only have dried thyme on hand go for it, just remember to reduce the quantity by approximately 1/3)

DSC00698

Start with the onion, salt,thyme leaves  and some freshly ground black pepper in a small skillet with some olive oil.  

DSC00700

Saute until the onion is very soft and starting to brown.  Add the garlic and the pepper flakes.  I’m using Aleppo because I like it’s  slight tartness and mild bite but you can substitute regular crushed red pepper flakes or simply omit them.  In other words don’t run to the grocery or let this be a show stopper.

DSC00703

Almost as quickly as you can stir the garlic and pepper in, remove from heat and put in a small bowl  in the refrigerator to cool.  

DSC00704

After the onion mixture has cooled, combine it with all of the remaining ingredients-egg, paprikas (I like to use sweet Hungarian for color and Smoked for flavor-), breadcrumbs (I always have Panko on hand, so that’s what I’m using but any type of breadcrumb will be fine).

DSC00706

I didn’t show it here but, it’s a good idea to crumble the goat cheese a bit.  It will help you mix it in evenly without overworking the meat mixture.

Divide the mixture into 8 equal size logs.  If you’re counting you will see that I failed this bit.   In my haste I only made 7!  But I didn’t want to overwork my lovely little logs so I went with it.

DSC00710

Wrap the logs in plastic wrap ( plug here for our favorite brand from Costco-every time my husband uses it he raves about it’s superiority).   Then chill for a while to firm them up.  An hour will do the trick but they can easily chill out for several hours or overnight.

DSC00711

 While the kabobs are chillin you have time to make some Tzatziki to go with the kabobs.  My “secret” ingredient is a bit of mayonnaise, otherwise it’s a pretty standard Tzatziki.  I think the mayo helps bring the flavors together, but if you’re a purist, leave it out and substitute with olive oil.

DSC00712

Many Tzatziki recipes specify grated cucumber, but I prefer a small dice to give a bit more texture to the sauce.   Peel, seed and toss it with some salt to get rid of the excess water and season the cucumber.  A 10 minute drain will do the job.  If you’re using a thin regular yogurt, you may want to drain it for a bit as well.  I suppose you could use low-fat yogurt, but the flavor will be a bit thin.  I prefer to use full-fat and simply eat a bit less of it.

DSC00716 DSC00718

Mix the drained  cucumber with the yogurt, some minced shallot/onion,  dill, mint, a clove of garlic mashed to a paste or pressed in a garlic press, a squeeze of lemon juice, a grinding of black pepper and 1 or 2 Tablespoons of mayonnaise or olive oil.

DSC00719

Top it with a bit of sweet or smoked paprika to make it pretty and put it in the refrigerator until ready to serve.

DSC00724

Back to the kabobs.  When the logs are well chilled and firm, light the grill and  thread them onto metal skewers.   If you are an apartment dweller with no access to a grill you can pan fry or bake them at 450° F for 20 to 30 minutes.   

DSC00725

In all cases the internal temperature should reach 165° F.

DSC00731

While the kabobs are grilling you have time to sauté a vegetable.  I have a bumper crop of yellow crookneck squash and another variety that sprouted up from my compost bin.  It’s the color of a patty pan but ball shaped and has lovely blossoms that I’m including in my sauté.  I could have done these on the grill alongside my kabobs, but I like being able to keep them warm in the skillet while I get everything else on the table.

DSC00733

A bit of red romaine, a slice of heirloom tomato, a  piece of naan bread , the squash from my garden and Goat Kabobs with Tzatziki Sauce.   I so love summer food!!!

DSC00737


DSC00735

Enjoy!

M.B.

Goat Meatball Kabobs

by: M.B. Einerson

Adapted from Bonny Wolf’s Billy Goat Meatballs who adapted hers  from The Meatball Shop Cookbook 

Servings: 4 to 6

  • 1 to 2 Tbs. Olive oil, divided
  • ½ medium Onion, finely diced
  • 1 ½ tsp. Fresh Thyme leaves
  • 1 tsp. Kosher Salt
  • Several grinds of Black Pepper
  • 1 clove Garlic, finely minced
  • ½ tsp. Sweet Hungarian Paprika
  • ½ tsp. Smoked Paprika
  • ⅛ tsp. Aleppo or Crushed Red Pepper flakes
  • ½ lb. ground goat or lamb
  • ¼ cup (2 oz.) Goat Cheese
  • ¼ cup Bread crumbs – I use Panko
  • 1 large Egg


Heat 1 Tbs. olive oil in a small skillet.  Add the diced onion, salt and thyme leaves and black pepper and sauté until the onions are very soft and lightly browned.  Add the minced garlic, paprikas and pepper flakes and sauté for less than a minute.  Transfer to a small bowl and refrigerate until completely cool.

Combine the cooled onion mixture with the remaining ingredients.  It’s best if you crumble the goat cheese to insure that it gets evenly distributed in the ground meat.  Mix thoroughly by hand and then divide into 8 equal portions.  Roll each portion into a kabob approximately 4 inches in length.  Place on a plate and refrigerate for at least 1 hour and up to 1 day.  When the kabobs are well chilled, place onto wooden or metal skewers.

Heat grill to medium to high heat and place kabobs onto hot grates.  Grill on all sides until well browned and the internal temperature reaches 165° F.  Alternative is to pan fry or roast in a 450° oven to the same end temperature.  If roasting, place in a baking dish that has been coated with 1 Tbs. of olive oil.

Enjoy!

M.B.

Tzatziki (Cucumber Yogurt Sauce)

by: M.B. Einerson

Adapted from a March 2014 recipe for Tzatziki in Saveur Magazine 

Servings: approximately 1 cup

  • ½ cup finely diced Cucumber, peeled and seeded
  • ½ Kosher salt, plus more to taste
  • 1 cup plain Greek or Regular Yogurt (if the brand of regular yogurt is very thin you may want to strain it in a cheese cloth or coffee filter lined strainer for a hour or two)
  • 1 Tbsp. minced fresh Dill or 1 tsp. Dried Dill Weed
  • 1 Tbsp. minced fresh Mint
  • 1 ½ tsp. fresh Lemon juice
  • 1 clove Garlic, mashed to a paste or pushed through a garlic press
  • ½ small shallot or onion, finely minced
  • Freshly ground Black Pepper to taste
  • 1 to 2 Tbsp. Mayonnaise or Olive Oil
  • Smoked paprika for garnish

Toss the finely diced cucumber with 1 tsp. Kosher salt in a fine mesh strainer set over a small bowl and let rest for at least 10 minutes, stirring occasionally.  Transfer the drained cucumber to a small bowl.  Stir in the remaining ingredients and refrigerate until ready to serve.

Enjoy!

M.B.